The Project: Runaway Thread
--PART THREE--
As one would normally create the blocks that make up the quilt top first, and then add the borders, this project allowed for a change in this process. This pattern works... no matter in which order you wish to do things.... So even though instructions still need to be followed, no one will know you changed things up.
As one would normally create the blocks that make up the quilt top first, and then add the borders, this project allowed for a change in this process. This pattern works... no matter in which order you wish to do things.... So even though instructions still need to be followed, no one will know you changed things up.
I just happened to do it in reverse, as the blocks for the border are smaller and more of them. So you can see, that my wish was to finish this quilt top successfully, rather than getting tired and being stuck with an unfinished top.
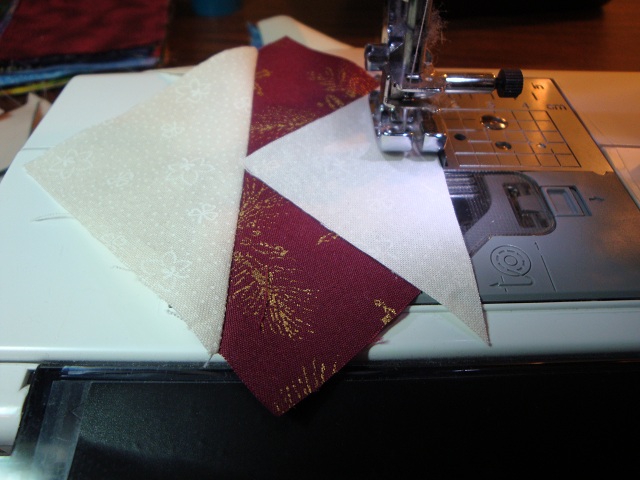
Main Block Construction
These begin with 6.5" background fabric squares. Then adding scrappy squares to create the spool. When you look at the overall design, the spools in the border are created with the light fabric and the center spools with the scrappy fabrics.
To complete the blocks, they are created the same as the border blocks; however, the fabrics used are just done in reverse. The scrappy fabrics will create the spool, after assembly.

Adding Scrappy Blocks

Cutting Off Extra Fabric

Block Placement
Ooops... Fixing A Dilemma!
Only at this point, did I discover that I had three of these pieces...

when I actually needed three of these pieces...

If I had not cut off the extra fabric on the blocks, all I would have needed to do was separate the larger scrappy piece and be done. However, since I had cut them, I had to adjust these blocks by thinking up a way to do that...
Not having enough leftover fabric to just cut three more blocks, I decided to add the same background fabric, creating a seam where there actually shouldn't have been one.

Replacing Corner
Now that I had make the adjustments, I could have stopped there. However, to make it look like less of an error, I did the same for all four corner blocks, and the two center blocks on the left and right sides of the quilt top.

Adding Balance at Side Center

Center Blocks Complete
Now, here one could have just added several plain borders until the size was what you wanted. However, the pattern is designed with a more creative touch... a unique block border creating a reverse effect from the center blocks.
Don't you agree, that simple borders would not have been as pretty as this one, here!

Fancy Border Added
I definitely enjoyed this project. There are lots of fun projects in this book. And, since I have more scrappy squares I'll need to revisit the list and see which one I'd want to make next time.
Now, if one wanted this quilt a bit larger, adding additional borders with fabric strips, would be simply easy. The image below shows how is fits on a queen size bed. It wouldn't take much to make it the proper size, if one desired. As I am leaving it as a quilt top, that could still be a possibility....
Finished Quilt Top

Runaway Thread -- (66" x 78")
Hope you enjoyed this project... until next time, have fun and do something creative!! For more on the book or the scrap therapy system, visit these links.
Happy Quilting,