The Project: Runaway Thread
--PART TWO--I began with the 3" block sizes as they will be more time consuming. Then made the 6.5" blocks for the main part of the quilt. However, here I will cover only the border strips in Part Two, and then the main part of the quilt in Part Three.
Block Construction
To complete the blocks, first a diagonal line is drawn on the wrong side of the background fabric (light). Then placed right sizes together with a scrap fabric block. I stitched just to the right of this line, so when it was pressed it was the proper size.

Stitching the First Corner
The instructions leave both layers as is; however, I cut them off. It worked out prefectly because I was short on the yardage and was able to use this cut off piece to do the opposite corner. I just had to align it properly to complete the blocks.

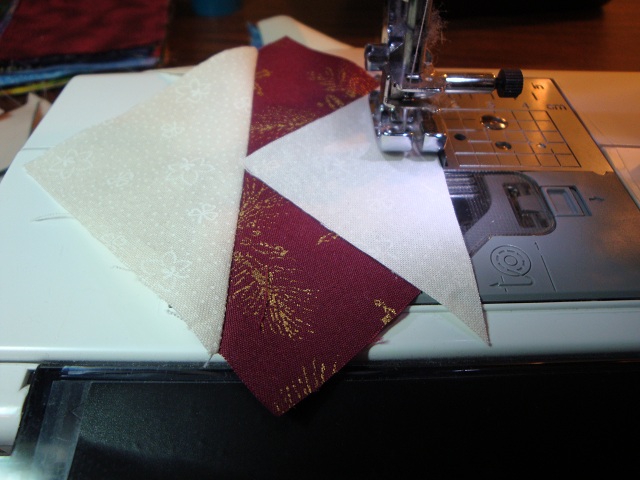
Trimming the Block Layers
Because I was using the pieces that were cut off, I did not have a square piece to align with the corner of the scrap square (as above pieces with the drawn line). I first sewed one (orange/white below) and then measured it as shown. This edge was used to align the light triangle piece so it would turn out the proper size.

Stitching the Other One

Trimming To Create The Stitching Line
Attaching the Other Corner
Border Construction
This was the first time I've ever worked on completing the borders of the quilt before doing the main part. With this pattern, this is possible as it is all calculated out for you in the instructions.
All the blocks are complete!! Next step, was to arrange all the pieces as shown in the book. Then, sewing together three blocks in rows and continue until the border strip was done.

Arranging Borders

Sewing A Row

Sewing the Rows to Make the Borders
Now that I have the rows stitched together into the final border strips, I am ready to stitch together the larger blocks for the center of the quilt. Coming in Part Three...

Ready For the Center
Next week... I will show you the remaining part to complete this quilt top. And also, show you how I fixed a serious error I had made in my block construction.
Happy Quilting,

No comments:
Post a Comment