Sunday, May 9, 2010

Paper Piecing... another way!

Paper pieced designs are complex. And to get those perfect corners this technique allows them to be stitched with perfection. Or, so it should...

Do you love to do paper piecing?
Or... do you hate it?

I took a class to try paper piecing when I first started quilting. I wished to see what quilting techniques would intrigue me. Would this be one of them?

Five Paper-Pieced Hearts
This little quilt is loved and today hangs in my sister's house.

However, as I did not enjoy this technique enough to embrace it... I was determined to never try it again!! So when one comes across those beautiful blocks in quilt designs, what should we do with them?

A few years ago, I came across this technique again. There was a block that I had included in a quilt design and figured I could do it in paper piecing, as there were only four corner blocks to make. I did try one, but seriously... to do it four times, not possible, I said! I found it was still just as frustrating to do, as it was the first time.

So, that time, I did it my way! I got the design to turn out perfectly using my own method... and no one would ever know that it wasn't paper pieced.

When one cannot create something like it was intended, then one discovers another way... so it becomes possible to still do it.

Not everyone is as challenged by the same techniques, so when you hear words, such as, "I'll be easy...!" you still can give it a try, even though you don't believe those words. As with quilting, it should always be up to us whether we continue with a new technique or not. I believe that is why we have such a wide range of techniques to create beautiful quilts. Our GOAL should always be to have fun in whatever ways - fit us best!!


ANOTHER WAY...

The Method:
1.) Print out the paper pieced pattern. (regular paper will do)
2.) Cut it out on the lines.
3.) Use these pieces as your paper templates*. (see link below)
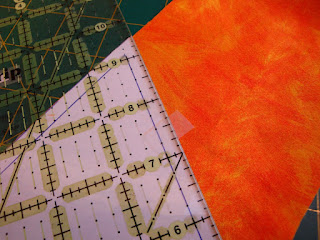
4.) Cut out the fabric with seam allowances automatically added. (using rotary cutting tools)
5.) Then follow the numbering on the pattern pieces to assemble the block.
6.) Press each seam before adding another piece.
7.) And with this process that difficult block is completed!**

More Details:
1.) See this entry for more information on using paper templates.*
2.) Next week's entry will have photos of this process.**


It is not my intent to ever take paper piecing seriously, so when I do come to a quilt that uses this technique, I decide how to proceed. I still take the view that quilting should be fun. Sometimes the learning curve is too difficult to overcome.... but sometimes, it just needs a change in attitude, that changes that too difficult technique into one that is enjoyable. So, you decide, love it or don't do it!! 


NINTH PROJECT - MAY 2010:


My ninth project will be shared next week...


Four Seasons of Quilts/
Cori Derksen & Myra Harder


Enjoy your quilting adventure for... 2010!!

Sunday, May 2, 2010

Bargello Quilts

Book:
The Bargello Quilt Book/ by Piecemakers

Time to reveal my next project... I choose: "Mini-Bargello" on page 12.  

Book, Fabrics

There are other great Bargello books that vary in design and complexity and would be fun to try. However, my goal is to dig through my own library of books that I haven't used yet and explore those possibilities first before I buy or borrow more.

My other goal, is to use my own fabrics and therefore the fabric colors are either matched as closely as possible or it allows me to do something totally different.

And, then…  as I usually gravitate to the smallest projects first, I was delighted that they included a “mini” version, just for someone like me. 


FABRIC SELECTION:

There are two main tips and then the rest is up to you.

1.  Use either prints or solids or a combination of them. The main rule is to shade fabrics from light to dark.  
2.  Choose a few fabrics you love and continue to expand from them.

There were some fat quarter fabrics that I would have chosen but wasn’t sure if I’d have enough yardage for the mini version. So now, I’d say, yes! It just means you’ll cut more strips, but sewing them together still works fine. 

I couldn’t decide from the larger pieces that I had… so, when I finally decided upon one print fabric, I chose all solid colors for the rest. I also went with only seven fabrics, instead of the ten used in this pattern.

What I loved, was the little black and white sketch of a quilt on the first page. It only used six colors, but it was so cute. If I had a few more blacks and whites, I would have tried making it.

Now, even though I don’t think I’d make another Bargello quilt, one can never be too sure. There are more interesting variations available in other books, that just may need further exploration.

As always, buying new fabrics in all the correct yardages, with the help of the quilt shop staff makes the fabric selection go very smoothly. But here I am talking about using the fabrics you already own, and that means allowing new choices to be tried. Try shopping in your own fabric corner for great color choices!!


THE PROCESS

After the fabric colors have been cut into strips, they are sewn together. Then from this, they are cut into the widths required, as shown below. I used a white label to mark the sizes as some of them really look similar when the process is ongoing.

 
Fabric Strips Marked by Size

A Pile of Strips

Sewing the Strips Together

Quilt Top Complete

Quilting the Layers

The Quilt Binding

Just remember, if you feel good about it, then enjoy the process as it unfolds. Who really knows… maybe you’ll come up with a unique design of your own, that others will enjoy making, too!!


My Bargello Quilt
Finished Size: 29” x 25 3/4”


Next week...
My next book choice and then a reveal the following week. If you wish to see what books are being featured you can also check out my website for more details.

Happy stitching!!

Sunday, April 25, 2010

Paper Templates

TEMPLATE QUESTIONS:

Why use a template? 
Templates are a necessary step for creating those odd shapes required for some quilting techniques.

What materials have been available for me?
Looking back in time, people used whatever materials that were available to them. I have enjoyed using all the new innovations that are available now, as I began my quilting journey only about 8-9 years ago. There are more tools and techniques available today that make our quilting journey much easier and fun!

When did I need templates for a quilting project?
The time I needed special templates was for a quilting workshop that I took in 2008. The process seemed much more difficult then I thought was necessary. That project is still waiting for completion.

How do I make my templates now?
As I understand progress, doing things in a new way for simplicity and greater success is why I make my templates out of paper, not plastic. Yes, that's right!!

As I see it, however fun a workshop is to learn a new technique, the desired goal is to complete a quilt. Now, I know that even though that seems simple, it may not always turn out that way, every time. 


HERE'S HOW I MAKE TEMPLATES:
These templates were for a project that needed several baby blocks in three different colors. By using paper templates, I can get to the sewing process more quickly.


Step 1.
The materials I will need are: fabrics, paper pattern, scissors, scotch tape, and my rotary cutting tools.

Step 1:  Rotary Tools


Step 2.
The pattern is either printed out or drawn onto white paper and then cut out. Then is attached to the fabric with small pieces of scotch tape, just enough to hold them in place.

Step 2:  Attaching the Template


Step 3.

From that, I just need to cut them out. I usually line up the sewing line with a 1/4" allowance added. This way if I don't have a seam allowance added on the pattern, it adds it for me when I cut.

These photos show the seam allowance added. Generally, I do not add seam allowances to a pattern, because I can easily add it when cutting my fabric pieces in this step. As when I do fusible applique, I do not need seam allowances, so then I would place the edge of the ruler without a seam allowance added.  

Step 3:  Cutting out the Template


The Paper Template:
  • Easily converts the pattern design to template pieces.
  • Time is saved because either it is printed or drawn out only once onto paper.
  • Lasts for many uses with the use of rotary cutting tools.
  • The cutting method automatically adds the seam allowances.
  • Once the paper design is printed and cut out, it is ready to lay onto the fabric.
  • No need to add seam allowances to the template before cutting the fabric.
  • No special markers or template materials are required.
Bonus: No extra time is needed to draw the shapes onto the plastic sheet, cut them out, then trace around the template to draw the shape onto the fabric and then finally ready to cut the fabric.


EIGHTH PROJECT - MAY 2010:


My eighth project will be shared next week...


The Bargello Quilt Book/
by Piecemakers


Enjoy your quilting adventure for... 2010!!