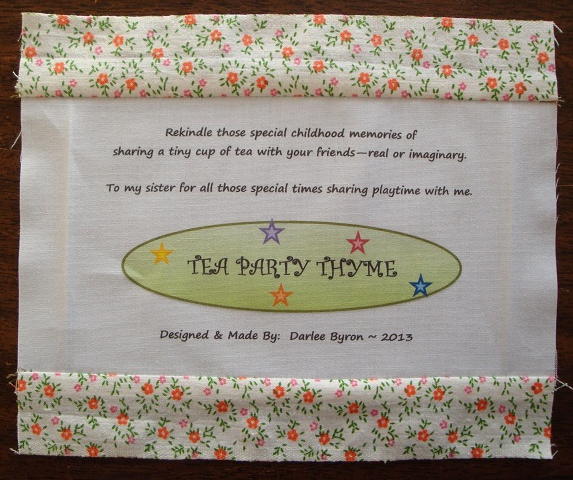
I like using my computer to design my own quilt labels to fit each project and make them each unique. As one can easily add color, insert images, fancy text, and make it all small enough to fit on a label. Editing is quick and easy; and when one is finally satisfied with the end result, off it goes to the printer.
Illustrations and
Photos shown in this tutorial are from the Applique Mystery Quilt Along—2014
project.
 |
| APPLIQUE MYSTERY QUILT ALONG LABELS |
1.
To begin, consider what you’d like to write or
draw on your quilt label.
2.
Open a word document and set up a table with
several rows and columns. As you plan out your design you can add more; or delete
any rows or columns you do not need.
3.
If you select “no borders” these will not
show when the label is printed. (These borders are visible in the illustration
below, as blue dots.)
 |
| LABEL IN A WORD DOCUMENT |
4.
On your page, provide white space around all
sides of your label, so you have room to cut around the label to allow for seam
allowances.
5.
Play with different layouts, fonts, and
images if needed, so you can see what works best for the label information.
6.
Once the design is ready, check it over for
errors and do any editing to finalize it before you send it to the printer.
7.
Insert your sheet or cut piece of PhotoFabric
into the paper tray and print your label with the best quality ink setting.
8.
Once printed, follow the manufacturer’s
instructions to prepare it so it is ready to work with.
9.
I find the type of fabric used in this
product will stretch out of shape as it is stitched onto the quilt back. One way
to keep the edges straight; and looking good once applied to the quilt back, is
with added borders. (I prefer to add at least two borders onto the printed label
portion. This allows the label to keep its shape.)
 |
| CLOSEUP OF STITCHING ON LEFT SIDE OF A LABEL |
10.
Embellishing the quilt label, you may add
applique pieces that are made specifically for the label or are extras from
your project, if desired. [examples below]
11.
A quick way to prepare and also eliminate
extra hand-sewing, is to use the selvage edge from fabrics to make the border
strips. (If you don’t use selvages, allow an extra width to fold back raw edges
on all four sides.)
| RISK AVOIDANCE: If iron is too hot; it
will scorch the label fabric. To be safe, use a pressing cloth when pressing the
seams and applique embellishments on your labels. |
12.
When adding each strip that goes around the
label portion, place the raw edges together with right sides together; and
stitch on the top and bottom strips, using at least a quarter-inch seam
allowance. Press open.
 |
| ADDING FABRIC STRIPS TO LABEL: TOP AND BOTTOM |
13. Trim
sides to where you want your seam allowance. Then add the side strips.
 |
| TRIMMING OFF EXTRA ON SIDES OF LABEL |
 |
| ADD STRIPS TO SIDES OF LABEL |
 |
| PRESS SEAMS -- FRONT SIDE VIEW |
 |
| VIEW OF BACK SIDE OF LABEL |
14.
If only adding the top and bottom strips; to
hide the raw edges, you will fold back both sides. (Having the top and bottom
strips will give it enough rigidity to keep the label straight as you
hand-stitch is onto the quilt.)
15.
If you do not want any raw edges, cut the
two side strips about one-half inches wider; and after stitching onto the label
section; fold these two raw edges under.
16.
The label has added color and will not
stretch out of shape; and is ready to hand-stitch to the back of the quilt.
17.
One last step: is to stitch the label to the
back of your quilt. J
 |
| FINISH TWO EDGES WITH PURCHASED BINDING |
 |
| SHOWN: BACK OF LABEL USING BINDING |
 |
| USING APPLIQUES TO EMBELLISH THE LABEL |
 |
| TWO SELVAGED-EDGE STRIPS USED; TOP AND BOTTOM ARE FOLDED BACK. (THIS LABEL WAS DAMAGED WITH THE IRON, SO I MADE ANOTHER ONE.) |
 |
| LABEL USES TWO SELVAGE-EDGED STRIPS - TOP AND BOTTOM. RAW EDGES ON BOTH SIDES ARE FOLDED BACK. |
 |
| FINISHED LABEL - TEXT AND IMAGE CREATED IN WORD |

2 comments:
Thank you for the label. I am going to try to print it and use it.
You are welcome. Hope you can..
Post a Comment