My 2010 Quilt Challenge is still on track... and here comes the third instalment. It has been enjoyable and when I seem to tire of it, I receive such wonderful responses, that it surely bounces me back into gear to continue the journey.
Take another look at the projects that I’ve blogged about over these last three months:
--Quilting Books on Review--
Several main goals still being maintained for this challenge are...
· EXPLORING the books in my own library with the Fuse-and-Tell book recently added to my collection.
· USING fabrics I already own, with only a few exceptions, as I bought some new fabrics at a yard sale.
· CREATING small projects to test out these new techniques is still my favorite way to test out new ways.
JULY 2010
Quilting for the first time
Donna Kooler
Donna Kooler
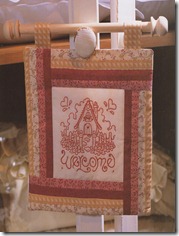
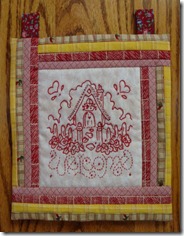
Redwork – Project 4
Book Project (on left) / My Quilt (on right)
My eleventh project allowed me to try Redwork embroidery. I had considered it before, but had not yet achieved that goal. I do enjoy embroidery and while this project was fun; I really do like working with lots of colours, not just one.
The question on project 4 was “How do I frame needlework with a lattice-strip border?” This I almost got right, but did make one mistake on the bottom strip. Oh, well, it looks okay.
This project is: 8 3/4" x 10 1/4" including the hanging tabs. Mine was very close at: 9 1/4" x 9 1/4" not including the tabs.
Advancing On II – with the Square-In-A-Square technique
Jodi Barrows
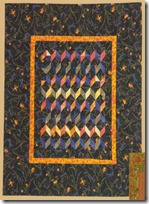
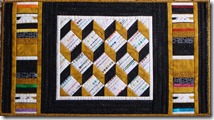
In The Garden with Tumbling Blocks
Book Project (on left) / My Quilt (on right)
My twelfth project was definitely fun to make and this was a good start in seeing how much fun the Square-In-A-Square ruler was to use. So, I’d love to come back and try out more of the options. And, her website has even more options available then are in this book.
This project is: 48" x 55" and rated as an intermediate level. Mine was very small as I only tried out a small sample and is: 33" x 18". I followed the block chart diagram and then modified the size with the additional fancy strips on the sides.
AUGUST 2010
Nature’s Elegance
Jan Kornfeind
Jan Kornfeind
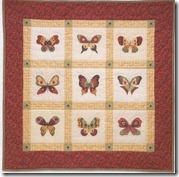
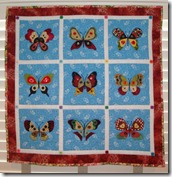
Butterfly Fancy Wall Hanging
Book Project (on left) / My Quilt (on right)
My thirteenth project was perfect for using those colourful scrap fabrics and an opportunity to dig into my button jar. Sewing on those 70 buttons did take some time, but if you love buttons it is a great way to use them. The book has some great options for using the butterfly blocks. And, one day I hope to revisit this book and try a project with birds.
This project is: 33 1/2" x 33 1/2". Mine was almost the same size, but I chose to add narrower borders at: 25 1/4" x 25 1/4".
SEPTEMBER 2010
Beautiful Borders Backings & Bindings
Jill Reber and Margaret Sindelar
Jill Reber and Margaret Sindelar
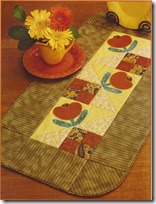
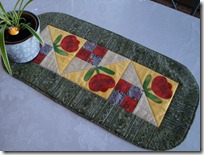
Orange Blossom Table Runner
Book Project (on left) / My Quilt (on right)
My fourteenth project was a change from the typical square shaped quilts. Even though I’ve used a mock piping on several projects, it was time to try a real piping technique. I did have trouble with the piping not knowing which machine foot would allow me to get close enough during the construction and when stitching it in place. I know I’ll have more success next time, when I use a much narrower cord.
I also didn’t really have the best greens to choose from to match up the project’s requirements, but did have experience with bias binding and attaching piping to a project. This project is: 18" x 34". Mine was very close at: 15 1/2" x 31". It ended up a bit smaller because I preferred to have the border narrower with the colour I chose.
Fuse-and-Tell Journal Quilts
Laura Wasilowski
Laura Wasilowski
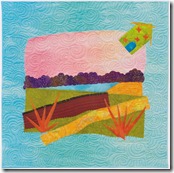
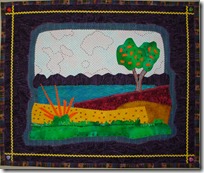
Peaceful Landscape: A Deceptively Calm Day
Book Project (on left) / My Quilt (on right)
My fifteenth project was definitely fun to make after I sorted out how I’d arrange my fused pieces. It seemed better when I changed the story of the quilt to something I liked. I stitched clouds in the sky and added a tree. It may even be an orange tree, now that I think about it. I like eating oranges. I really enjoyed the variety of embroidery stitches and colours used. It was also fun to embellish with rick rack and buttons. Hand stitching is not really so terrible as I’ve thought, mostly because there is no hemming involved in quilting.
I think I’ll still add a hanging sleeve sometime, as I didn’t feel the small hanging rings were enough for the weight of my quilt with the extra layers. This project is: 16" x 16". Mine was close at: 18 1/2" x 15 1/2".
What techniques do you wish to try or already are your favourites? If you have enjoyed this review, why not leave a comment below?
See what’s coming up… check out my website for more quilting techniques and inspiring books.
Enjoy your week…


4 comments:
Love the little selvage quilt you made in July. Do you read Karen Griska's Selvage blog (http://selvageblog.blogspot.com/? Great ideas there. www.nappinnanaquilts.blogspot.com
Thanks JoAnne. I visited your blog and it was lovely. And, yes I follow Karen's blog. I reviewed her book in February.
I have a long list of blogs I enjoy and this has gotten to be one of my favorites. I've been thinking of trying it next year. I love that you make smaller projects. My brain always thinks bed size quilts. Thanks for a great blog!
Thanks, Dorothy! We all are unique in our approach to quilting. I am inspired by your kind comments. Thanks for sharing with me.
Post a Comment